Veeam Backup for Microsoft 365 is a complete solution that lets you backup and restore data from your Microsoft 365 organizations, including those that use Microsoft Teams, Microsoft Exchange, Microsoft SharePoint, Microsoft OneDrive for Business, and on-premises Microsoft SharePoint.
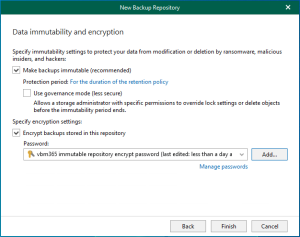
With the ability to store backup data on any object storage, such as Azure Blob Storage, Amazon S3, IBM Cloud Object Storage, or S3-compatible storage, the latest version of Veeam Backup for Microsoft 365 v8 offers immutable backups along with immutable backup copies for complete defence.
1. Login to the Veeam Backup for Microsoft 365 Manager server
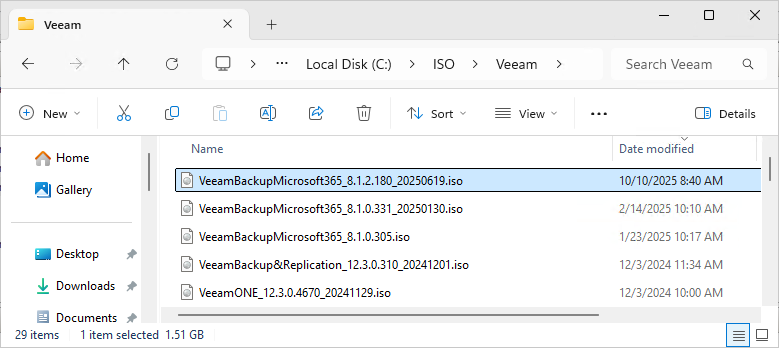
2. Download the Veeam Backup for Microsoft 365 V8 ISO image file. (Sign in required)
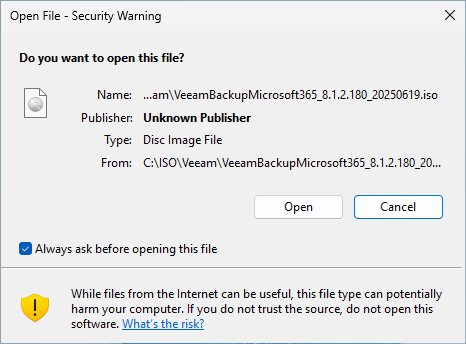
3. Mount VBO365 v8 (VeeamBackupMicrosoft365_8.1.2.180_20250619) ISO image file.
4. On the Open File Security Warning page, click Open.
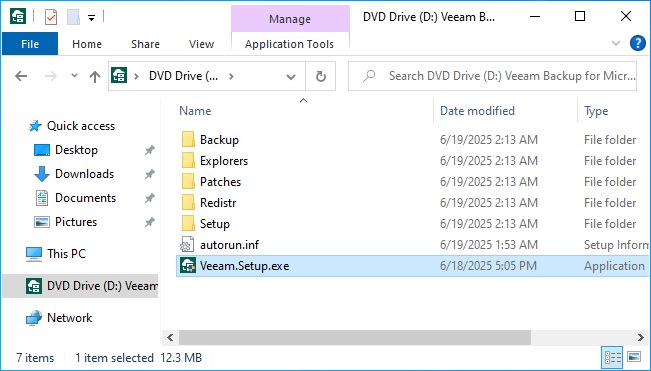
5. Double-click Veeam.Setup.exe.
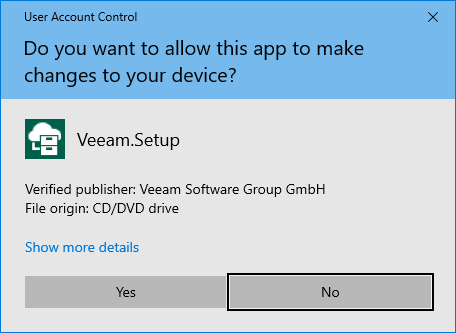
6. Click Yes on the User Access Control page.
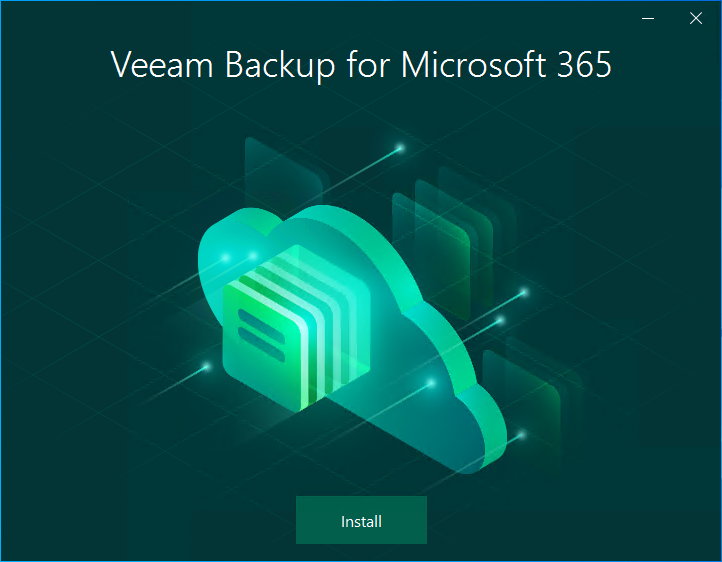
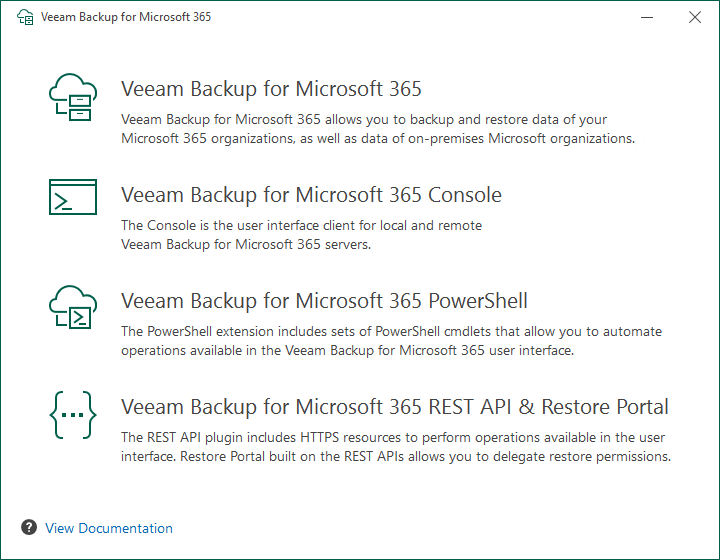
7. Click Install on the Veeam Backup for Microsoft 365 page.
8. Click Veeam Backup for Microsoft 365.
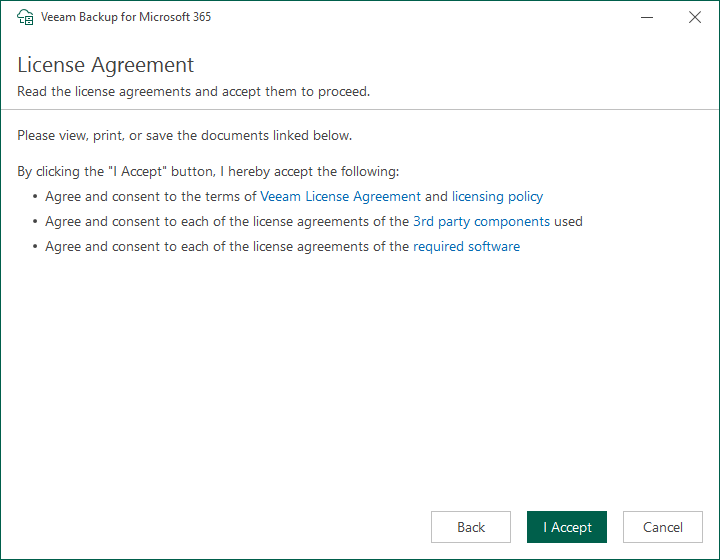
9. Click I Accept on the License Agreement page.
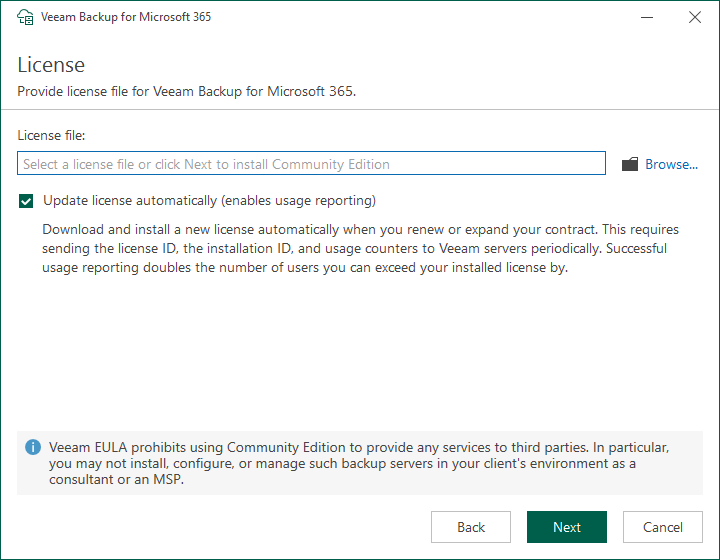
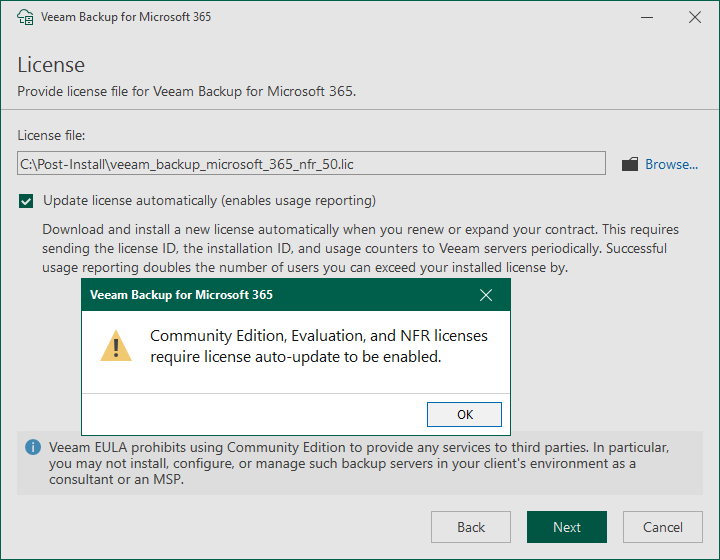
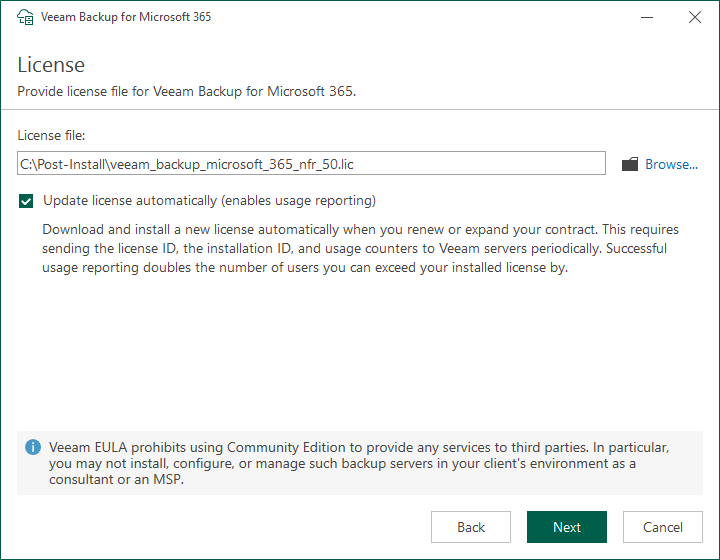
10. Click Browse on the License page.
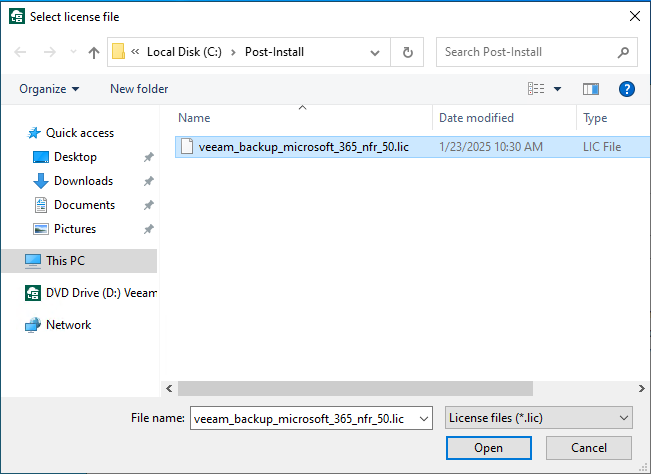
11. Select your license file and click Open.
12. If you are using Community Edition, Evaluation, and NFR licenses, you must select Update license automatically (enable usage reporting).
13. Click Next on the License page.
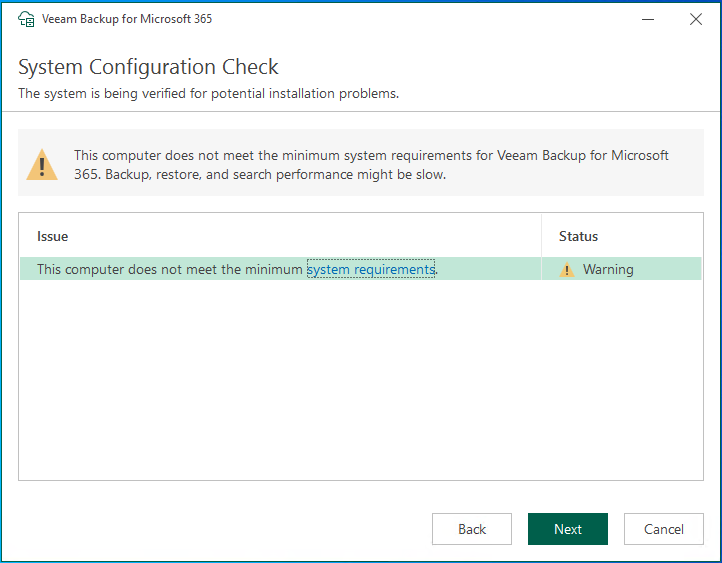
14. Please ensure the server meets the minimum system requirements on the System Configuration Check page.
Note:
The detailed information is in the following link.
https://helpcenter.veeam.com/docs/vbo365/guide/vbo_system_requirements.html?ver=80
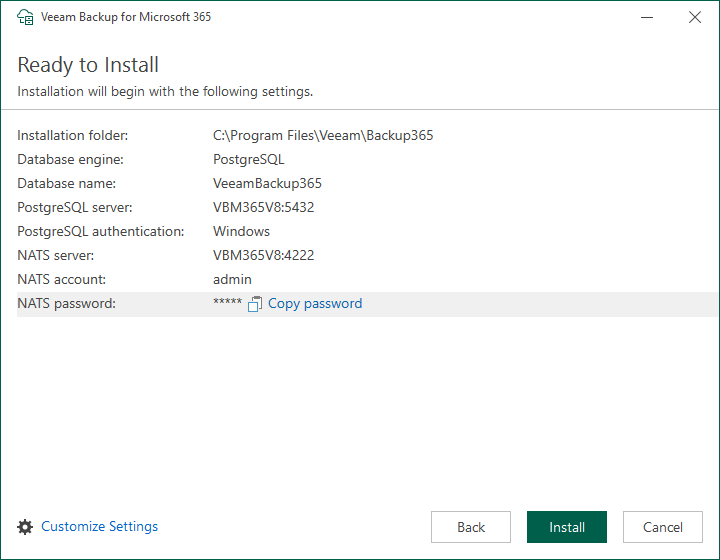
15. On the Ready to Install page, click Copy password and save the NATS server information.
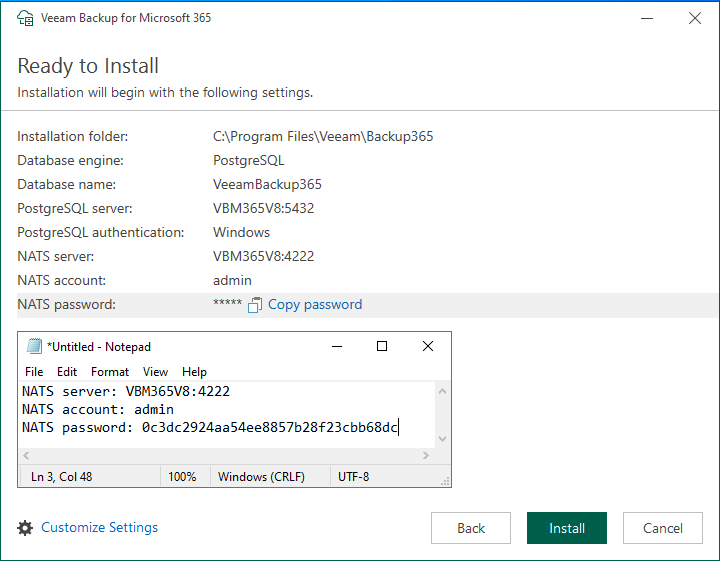
16. Click Install on the Ready to Install page.
Note:
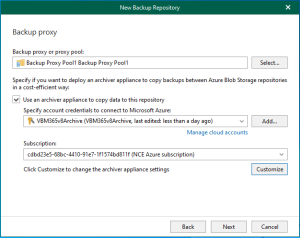
You can click Customize Settings to change the default settings.
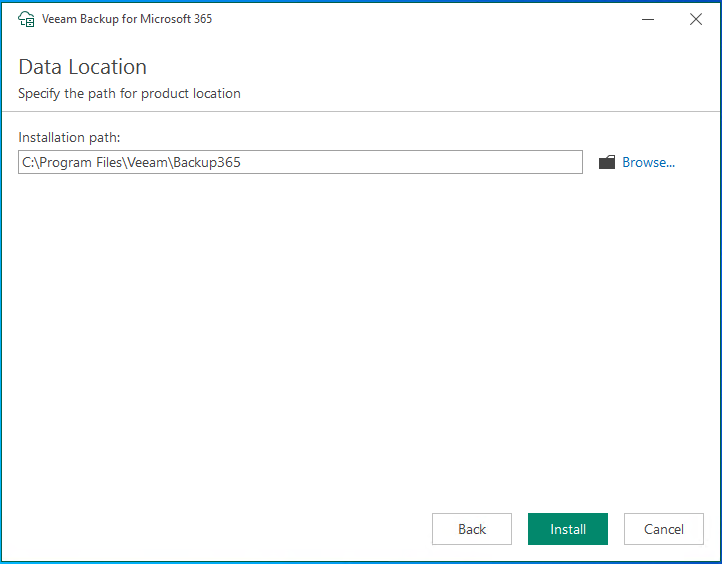
17. Avoid installing the product on the OS/Boot drive for a production install. Recommend creating a dedicated Application Install Volume.
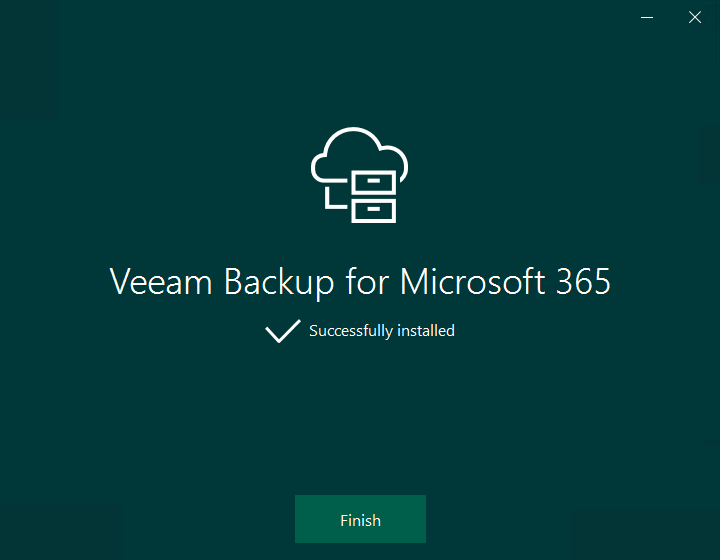
18. Click Finish on the Successfully installed page.
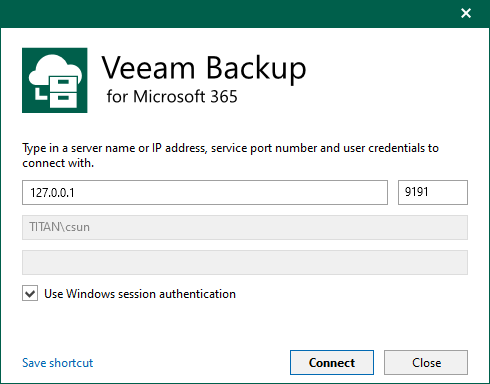
19. Open the Veeam Backup for Microsoft Office 365 console and click Connect.
20. Drop down the main menu, select Help and Support.
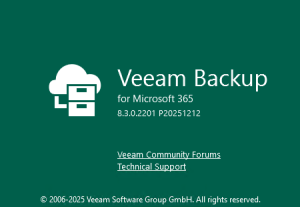
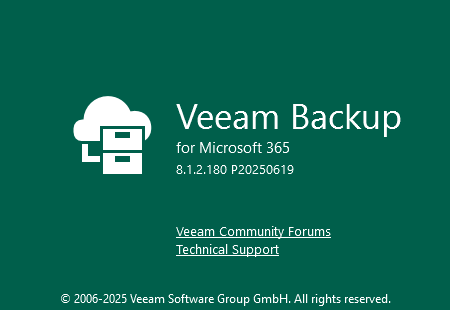
21. Click About to check the version of Veeam Backup for Microsoft 365.
I hope you enjoy this post.
Cary Sun
X: @SifuSun
Web Site: carysun.com
Blog Site: checkyourlogs.net
Blog Site: gooddealmart.com
Amazon Author: Amazon.com/author/carysun
Author: Cary Sun
Cary Sun has a wealth of knowledge and expertise in data center and deployment solutions. As a Principal Consultant, he likely works closely with clients to help them design, implement, and manage their data center infrastructure and deployment strategies.
With his background in data center solutions, Cary Sun may have experience in server and storage virtualization, network design and optimization, backup and disaster recovery planning, and security and compliance management. He holds CISCO CERTIFIED INTERNETWORK EXPERT (CCIE No.4531) from 1999. Cary is also a Microsoft Most Valuable Professional (MVP), Microsoft Azure MVP, Veeam Vanguard and Cisco Champion. He is a published author with several titles, including blogs on Checkyourlogs.net, and the author of many books.
Cary is a very active blogger at checkyourlogs.net and is permanently available online for questions from the community. His passion for technology is contagious, improving everyone around him at what they do.
Blog site: https://www.checkyourlogs.net
Web site: https://carysun.com
Blog site: https://gooddealmart.com
Twitter: @SifuSun
in: https://www.linkedin.com/in/sifusun/
Amazon Author: https://Amazon.com/author/carysun